December 1, 2016

For the lego lover: DIY lego table

This Lego table was one of the most exciting ideas and creations I've had. I am extremely happy with the way this project turned out. It will be around for many, many years.

My little guy became obsessed with Legos when he turned 4. We enjoy building a new Lego creation from instructions, and we enjoy creating together. Legos has encouraged more creativity and imagination. So I set out to find a large Lego table for future Lego creations. I was inspired by the Lego Movie and knew exactly what I wanted.


I started my search, but I could not find the table I had in mind. Every Lego table I found was too small and expensive. I decided to make my own. I spent weeks searching for the right sized dining table at the right price. I finally found the table on jet.com. It's fun watching the price drop after it goes in your cart! It was listed for $128. I paid $109, no tax, free shipping. The table measures 60L x 36W x 30H inches. Thank you, Jet.com!
https://jet.com/product/Homelegance-Tibalt-Black-Dining-Table-60-in/db38cebd98984cfdbb2d64d1f038abb7


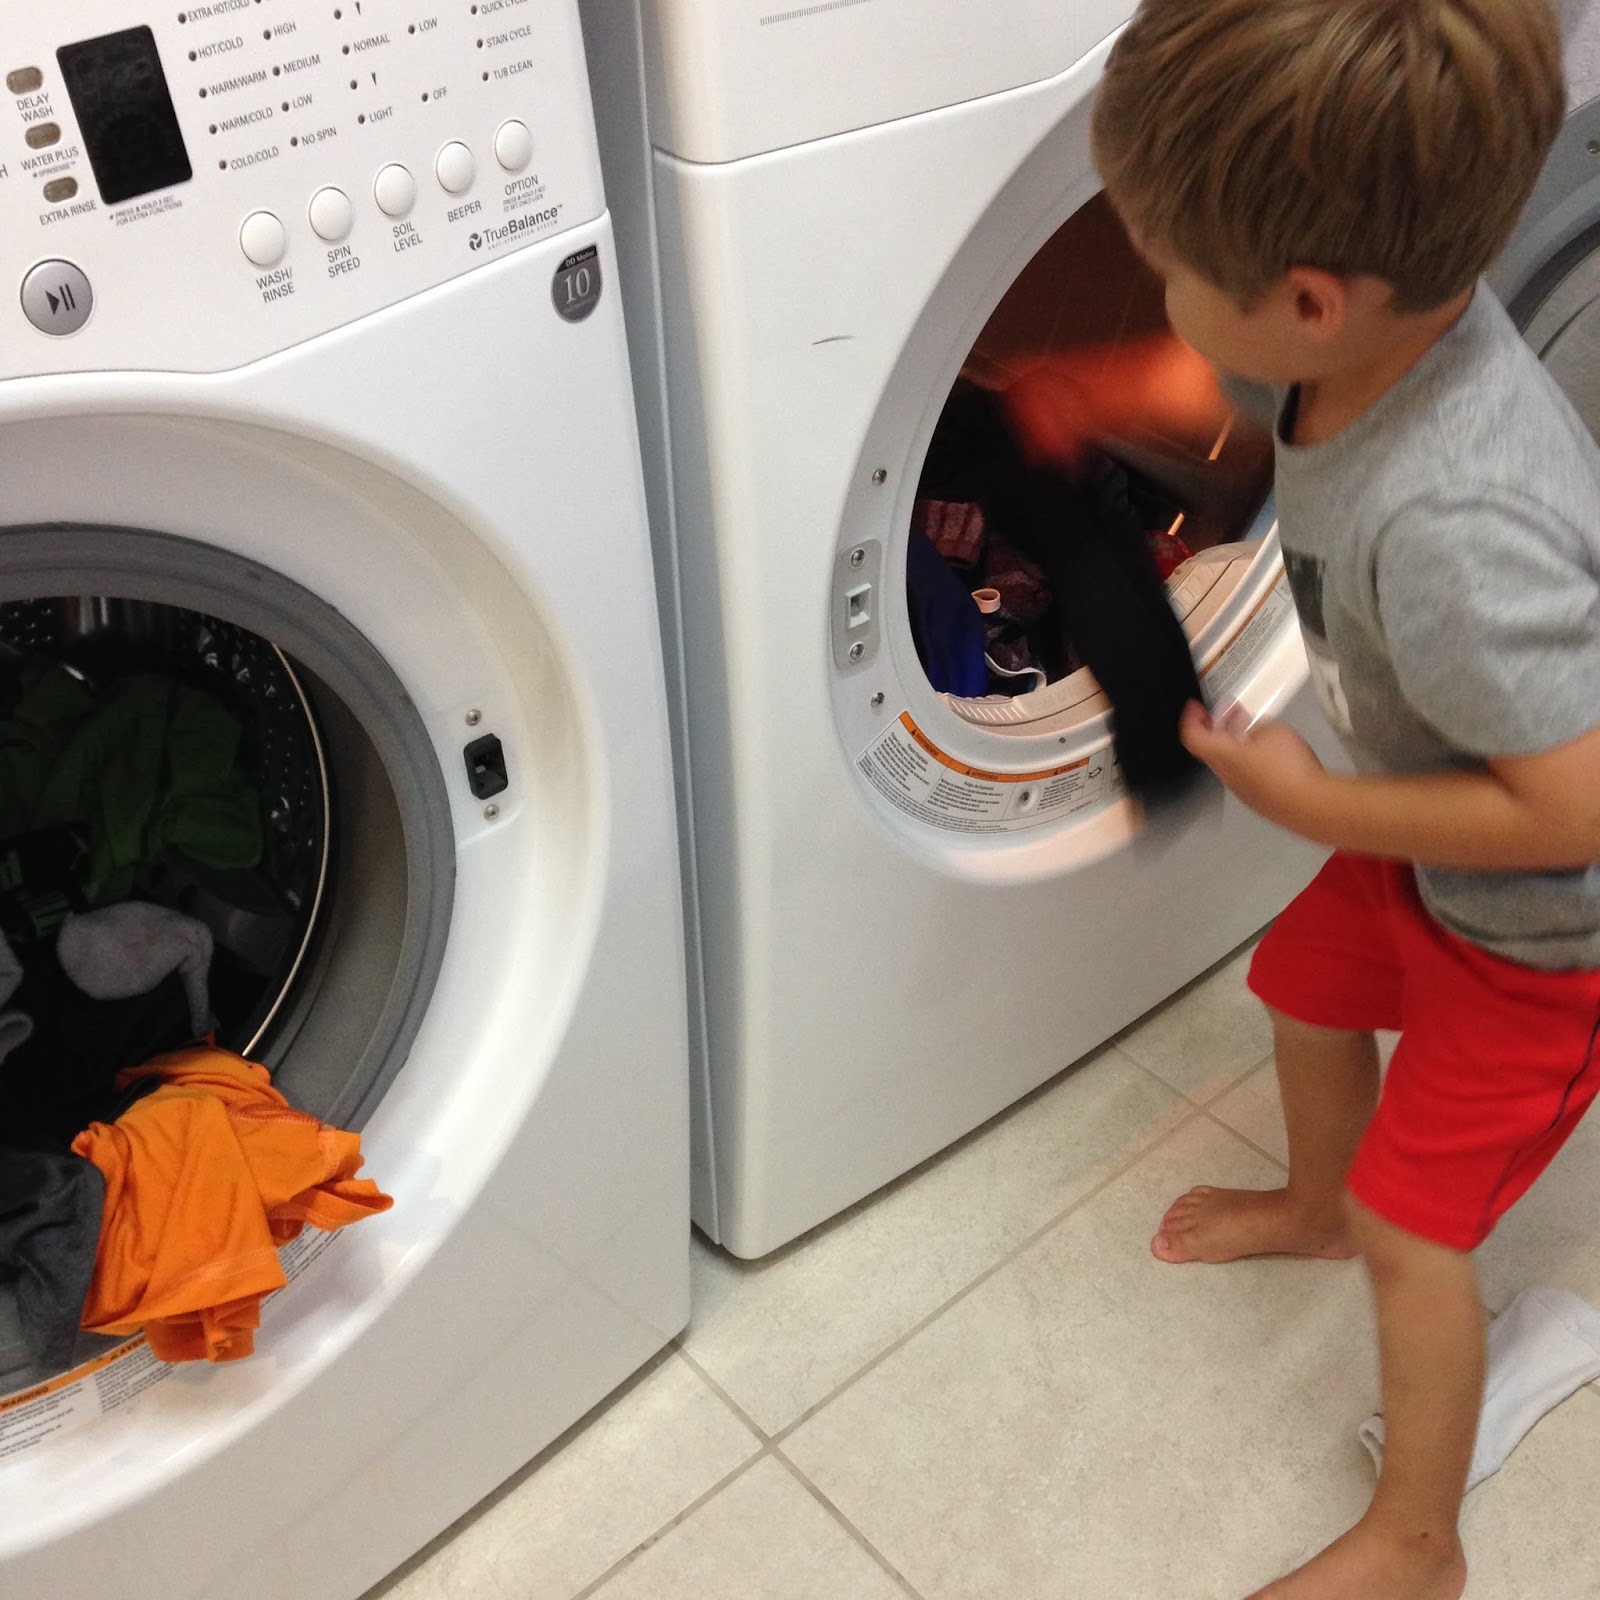
I cut the 30" legs down to 24" high with the help of a circular saw and screwed the legs in with the screws and tool that came with the table. The table took 15 minutes for one person to put together. I went for 24" H on the legs, because it gives him room to grow with it (he is 42" tall), while still allowing a kids chair to be pushed under it. My husband sits on the floor and reaches fine.
I purchased Lego baseplates from Amazon. I went with the Lego Education Building Plates set on Amazon, because it came with the "old school" color green and blue plates in 10x10. I could not find blue plates sold individually online or at the Lego store. I also used the Lego sand baseplate. I used Lego plates as opposed to the Lego compatible.

I laid out the base plates, on the table, the way I wanted them and used legos to connect the plates for the proper placement. THIS IS A VERY IMPORTANT STEP! You can not simply push the plates together and glue, or the Legos will not connect onto other base plates. I, then, determined less than an inch needed to be cut off 1 grey plate and 2 green plates to fit perfectly on the table.

I used a box cutter, laid the plates on the driveway and used Legos as a guide. I just worked my way down. It took about 5 cuts to allow me to break the piece off. Since it was my first time, I was afraid I would ruin Legos by using them as a guide. Now that I know they weren't damaged, I would have used more to avoid alternating them all the way down. I cut the same size strip off 3 base plates.


I then used the cutter to smooth the cut side. It didn't need much.


Lastly, I snipped a tiny piece off the 2 pointy edges to round it out.


I laid the newly cut base plates on the table, connected them with Legos and began to glue. I glued one plate at a time and placed it back in it's position with the Legos keeping it in place. I pressed down firmly and went on to the next plate.

I found the best glue for this project was the Gorilla Super Glue Gel. I figured that out when I ran out of several bottles of the gel pretty quickly and then used original gorilla glue on the rest of the plates. The original gorilla glue expands. It oozed out in some spots and raised a couple of base plates by a tiny amount. The GEL worked perfectly, and did right by this project. The gel was definitely the better glue. I used almost a bottle on an 18x18 plate and more than half a bottle on a 10x10 plate.


Wood table below is 32"x16" and sells for $180 plus $30 in shipping.


Plastic table below is 23" in diameter and sells for $75.00. This is what we used for 3 years.


Our table is 60"x36". I spent $258 on the table and baseplates. This does not include the glue.
I hope this helps you make your own Lego table. You can use any size table, even a coffee table, to come up with your own creation!

November 8, 2016

Mashed Cauliflower

Have you taken the leap from mashed potatoes to mashed cauliflower yet? You've got to try it. Don't get me wrong. I love mashed potatoes. My mom makes the best ones. I also love to eat healthy and enjoy the thrill of making healthy foods taste delectable. This is one of them. Mashed cauliflower tastes sinful, but it's a guilt-free and delicious way to cut calories and lower carbs. One 2 1/2" boiled potato contains about 27g of carbs. 1 medium (5-6" dia) boiled head of cauliflower contains about 23g of carbs. Bonus-It doesn't taste like cauliflower. Your mashed potato loving kids will not know the difference.

We serve mashed cauliflower under sea scallops for a fine dining feel at home. We also serve them with steak or grilled chicken and more vegetables (try them with green beans). Serve them with anything you like having mashed potatoes with!

There are a ton of ways to make it. You can add parmesan cheese, chicken broth, cream cheese, garlic, cottage cheese, or milk. You could simply add some cooking liquid from the cauliflower to thin it out, and that's it! I like to experiment with different ingredients to change it up.

My mom's mashed potatoes have sour cream, cream cheese and butter. We replaced sour cream for plain non-fat greek yogurt many years ago. The yogurt tastes just like sour cream. Yes, we use it on tacos, too. While I absolutely love her recipe, I had to come up with a healthier compliment while achieving a similar flavor.

I share with you the way our family enjoys mashed cauliflower.


hands-on time: 15 minutes
total time: 25 minutes
makes 4 servings


2 medium cauliflower heads, cut into chunks
1/2 cup plain non-fat greek yogurt
2 tablespoons butter
kosher salt & pepper to taste


Bring water to boil. Add cauliflower. Boil cauliflower for 8-10 minutes until tender with a fork. Place in blender with yogurt, butter, salt and pepper. Blend til smooth.


I love this dish. I hope you enjoy it, too!


September 27, 2016

The Ballcap Buddy

We are a ballcap wearing family, and I finally found the best way to clean them!


We would wash our caps in the washing machine, and they would get ruined. So we either bought a new cap (and caps are not cheap) or didn't wash it (and that got gross). I went back and forth with buying a Ballcap Buddy for years. I just didn't like the idea of putting a dirty cap in the dishwasher or wasting money on water to wash it alone. I gave in when hubby so badly wanted his newest cap to be cleaned and not ruined. I bought the Ballcap Buddy, and it saved our favorite caps. It's intended for the top shelf of dishwasher or top load washing machines. It's very specific to not use in front load washing machines. I do the short cycle of dishwasher and take it out to dry by leaving it on the ball cap buddy til dry. Wish I bought it years ago. Better late than never.


This cap was my guinea pig. I figured I couldn't ruin it more than it already was. I went to town with Goop (see GOT GOOP post from 2/27/16), let it sit for 20 minutes and threw it in the dishwasher. Came out brand new. I almost cried.


before
 after

I bought my Ballcap Buddy from the LIDS store for $5.99. Amazon carries them for $7.95 with Prime shipping.
https://www.amazon.com/Original-Ballcap-Buddy-Cap-Washer/dp/B0013FGVW2


I don't know if the type of dishwasher soap makes a difference. I use Cascade Platinum ActionPacs. It is not only amazing on our dishes, it works great on the caps.
https://www.amazon.com/Cascade-Platinum-ActionPacs-Dishwasher-Detergent/dp/B00O7Y9DGW/ref=sr_1_1_a_it?m=ATVPDKIKX0DER&ie=UTF8&qid=1474997343&sr=8-1&keywords=dishwasher+detergent

August 10, 2016

How I lost my pregnancy weight

I gained 54 pounds when I was pregnant. My doctor wasn't concerned. She assured me I would be able to get it off. I didn't believe her. I was always hungry, and I was addicted to Starbuck's. I stopped on my way to work every day in the 2nd and 3rd trimester for a blueberry scone. It was my guiltest pleasure. I ate greens and ate as healthy as I could. I was just ALWAYS hungry.

This was me the night before I checked into the hospital. We went to the Michael Jackson Cirque du Soleil show. People stared. I didn't understand why until I saw this picture after my son was born. I must have looked like I would tip over at any moment. My family had bets on how big baby boy would be. Sweet boy was an average 7 pounds, 8 ounces.


When my son was 3 months, I saw a commercial for Tracy Anderson Metamorphosis. It looked easy enough, and I might get good results. I tried some of her other videos right before I got pregnant, so I didn't get to commit to them as I had done in the past with Tae Bo, Power 90, P90, P90X and Slim in 6. I bought the Metamorphosis Glutecentric version. I was nowhere near my pre pregnancy weight and couldn't fit into any of my clothes. I was very intrigued by the commercial and so bored with the P90's of the world.

I have 2 be clear about 3 things.
1. I tried the eating plan for 2 days. It was disgusting, and I almost passed out in HEB. I decided to stick with my normal daily diet (white & green), because I already enjoyed eating well. I haven't been on a "diet" in over a decade. I consider my daily diet to be the way I normally eat.
2. I don't care what some say about her. I lost my pregnancy weight and another 15 pounds on top of that. The inches kept coming off. She keeps me motivated to move, and I feel powerful after her workout.
3. Her method is not for everyone, and that's ok! Some say they don't like it, without trying it, because they don't want to look like her. Tracy Anderson is 1 of 2 of J Lo's trainers, and J Lo looks like J Lo. The fact is - she gets you moving a way that most don't.

Just as P90 changes the workout to avoid focusing on one group of muscles, Metamorphosis changes to a new workout every 10 days. I admit it was a true dedication for 8 weeks. And it was definitely not as easy as it looked. She advises 6 days a week for 1 hour a day. I worked out 5 days a week for an hour a day for 8 weeks. I was determined. The inches and weight just fell off. I was content with fitting back in my clothes, so I backed off and did 30 minutes a day. At the end of 4 months, I weighed less than my pre pregnancy weight. I'd lost 18 pounds & 17.25 inches and continued to lose more. After another 5 months of 30 minutes a day, 4 days a week, I lost another 6 pounds and more inches.

Metamorphosis comes in 3 dvd's with 90 days of workouts. Tracy Anderson has made years worth of Metamorphosis DVD's, and I still have them delivered to my door. I may be back logged on them, as I do not exercise often enough to keep up with the program...but, Metamorphosis is still the only exercise I do. I feel like a powerhouse when I finish her workouts. I average 30 minutes a day, 5 days a week with some form of physical activity. Some of those days may be kicking the soccer ball with my son for 30 minutes. Then I'll catch one of her dance or exercise clips on instagram and get excited for a 30 minute workout the next day. When I do pop in her exercise video, I pick up from wherever I left off.

Whatever you choose to do as your exercise routine, just get moving! Exercise can help or prevent health problems, improve your mood, boost your energy, promote better sleep, and can be a fun way to spend time with your family.


June 12, 2016

cilantro burgers with sriracha mayo

At the start of the new year, I decided to change things up by making 2 new recipes a week.  I wish I had kept track of all the new recipes I've made since January. This thought didn't occur to me til May.

We eat at home about 5-6 days a week. I like cooking, and we like healthy eating. We also appreciate knowing what's going in our food. While I can cook dishes without a recipe, it gets hard coming up with interesting, new and tasty on my own. It's inspiring to get new ideas. I will buy magazines, I will do research, and I will share my findings with you. A favorite magazine of mine is Cooking Light. This baby is not cheap. So, if I buy a copy, you bet I'm going to make as many recipes as I can from it.

We eat white meat or fish most days. A burger is a once a week or every other week splurge. Hubby and I love a good burger. Our version of a good burger is one with cheese. Any cheese. And sauce, from mayo to chipotle ketchup. A new favorite is Cilantro Burgers with Sriracha Mayo. Hubby works out 6 days a week. So Hercules needs more food than I do. While this recipe feeds 4, I make 3 burgers out of it. A half pounder for hubby and two 1/4 pounders.


TIPS about this recipe-
We eat a lot of cilantro, so we add more than the recipe calls for.
We use a lot of kosher salt and cracked pepper to flavor our meat.
We double the mayo recipe, because we use plenty on the top AND bottom bun to give it the sauciness. It makes up for the lack of cheese. This way, we don't miss it. Like I said, burgers are a splurge for us. You may as well do it, right.

hands-on time: 20 minute
total time: 20 minutes
makes 4 servings

1 pound 90% lean ground sirloin
3 tablespoons chopped fresh cilantro
kosher salt
freshly ground black pepper
4 burger buns
3 tablespoons mayo
1 tablespoon sriracha
1/3 cup cilantro sprigs


Combine ground sirloin, chopped cilantro, salt and pepper in a bowl; mix just until combined. Divide sirloin mixture into 4 equal portions, gently shaping each into a 1/2" thick patty.


Heat a grill to medium high heat. Add patties and grill 4 minutes. Turn patties and grill 4 more minutes or until desired degree of doneness. Remove patties. Add buns to grill, cut sides down. Grill 1 minute or until toasted.


Combine mayo and sriracha in a small bowl, stir. Spread mixture on bottom half of each bun; top each with 1 patty. Divide cilantro sprigs evenly among patty; top with top halves of bun.


Recipe inspiration from Cooking Light

June 8, 2016

My Not-So-Overwhelming Cleaning Schedule

People have asked me how I keep my house so clean. It actually does require a bit of organization and planning on my part, so I'm not cleaning for one whole day. A day of cleaning is exhausting, boring, and not likely to get all done when you have a child at home with you.

Hubby and I are most relaxed in a tidy home. We prefer a swept floor, toys picked up from the downstairs before bed, and a clean kitchen to wake up to every morning. By clean kitchen, I mean no dirty dishes in the sink. I keep a toy basket in the downstairs closet. It's an easy place for us to do a quick stash.

Several years ago, we decided to save money by no longer using our maid service. The only way I could get out of spending a day cleaning was to make a schedule of daily tasks that would keep the house clean. The schedule allowed me to still spend lots of time with our little guy and/or run errands, while enjoying a clean home. I don't stay home every day. I did for one year after our son was born. Then he went to a 2 day a week Kids Day Out program, and I work on those 2 days. I adjusted my cleaning schedule to have a lighter task on the days I work.

My Not-So-Overwhelming Cleaning Schedule
 

And, let's be real. I may not vacuum every Thursday. Maybe I'll let another week go by. I'm sure going to try, though, because my son and hubby have terrible allergies (some of which include dust mites).

I fell out of my routine the end of last year. I struggled getting back in the groove at the beginning of this year. I was a slacker. Then it started spiraling. I had too much to do. My head was spinning with what needed to be immediately cleaned (restrooms) to things I needed to do (dust baseboards, replace air filters, replace an outdoor floodlight that was knocked out in the hail storm). I keep a planner, but that wasn't going to work for this list in my head. I decided to just write it all down. Everything. I made a list, and it kept growing. I stuck it on the fridge knowing I could see it better there. My goal was to knock out 1 or 2 things a day. It was an accomplishment when I could mark something off the list.

The Big List


The house is almost back where it needs to be (I still need to do my annual baseboards dusting), and I am now able to go back to my daily schedule. And there you have it! Now you know the Adams family has clean sheets on Friday.

June 7, 2016

Daily To-Do's at 3

My little one is 3. He's now able to dress himself and needs reminding to brush teeth in the morning. I created this chart and used the help of superheroes stickers. Since he's already such a helper, I decided to use it on the chart.We are a family of helpers. I think it's an important quality to have in life. The chart is at his eye level at the bottom of the fridge.
 
Art is definitely not my strength, but he knows what the smile means!


May 24, 2016

Involve Your Child

My little guy likes helping. He likes to be involved in most everything. Is it because we've been involving him in things ever since he was 2, or is it his personality? Maybe, both.

When little buddy was 2, he saw me sorting the dirty laundry into piles. He wanted to do it. Of course, he wanted to push the buttons on the washer and dryer, too. So, I taught him what to push. He knows how to spell the word cold, because he's been seeing it for so long. It was another opportunity to talk about colors at age 2, as I handed him the item for the different stacks. He genuinely enjoys helping me in the laundry room. He actually wants to help. I'm not sure why anyone would like sorting laundry or loading the washer and dryer, but I do love his company...and his help!
My 3 year old helper

I also introduced the world of baking at 2. He loved playing with my baking bowls, so I thought it was time to teach him what we really do with those. It started with his favorite homemade blueberry muffins. I stood him on a chair at the counter. He would help me pour the ingredients in the bowl and hold my hand while I used the whisk. I began to stand him next to me while I cooked and teach more about the stove, fire and heat. I didn't put him too close, like I do now, but he wanted to learn how to cook.

I quickly realized the chair was not going to cut it. We bought a step stool from Amazon, after seeing it at a friend's house. We all love it! At 3 years old, he has made many dishes with me from beginning to end. It's more learning...the names of herbs, what garlic smells like, what letter the word basil starts with, what else starts with B, close your eyes and smell this herb, etc. There are times when he wants me to play with him when I have to cook, so I'll ask him if he wants to help me make whatever dish I'm making. Sometimes he wants to. This way, we can still be together and do something we enjoy. It may take me a little longer. That's definitely ok with me.

I purchased our stool from Amazon. It was about $118 at the time. It is definitely a large piece, but worth it. He can do puzzles, color or have a snack at the counter while I'm in the kitchen.


I definitely appreciate his help, and I appreciate that he will know how to cook at a young age and know how to do his own laundry before he leaves for college.

May 22, 2016

My Necklace Rack

When my dad taught me how to lay wood flooring in my closet, I made my side of the closet a little more feminine. I'd been looking for just the right necklace holder for 20 years. I found this one on Etsy. It's perfect. Mine is stained driftwood gray. It has Velcro adhesive on the back, and is super durable.

https://www.etsy.com/listing/210525346/driftwood-gray-wood-hanging-necklace


May 7, 2016

Acrylic Bookshelves

One of the most exciting purchases I made for little buddy's room was acrylic bookshelves. The shelves easily transitioned from baby room to big boy room. They go with boy or girl décor and give the room some modern character. My dad & I spent one morning a couple of years ago putting them in. I am still so pleased with the way they came out. I ordered 5 of the 36" shelves.
http://cleardisplays.com/card-display/greeting-card-holder/clear-flat-shelves-3-1-2-deep/


We recently completed his big boy room with a new dresser. The acrylic shelves and dresser go with everything...superheroes, Star Wars, cars, construction vehicles, you name it. I kept the bedding simple so I can change out wall art, accessories, etc. with whatever he's into as he grows up.


April 29, 2016

Pan-Seared Chicken with Pecan-Scallion Gremolata

One of our favorites. It's hard for me to eat one serving. This dish is amazing with any green. Our favorite is chicken placed over arugala. For 2 of us, I grab 3 large handfuls of arugala and place in mixing bowl. Squeeze 1 lemon over arugala. Drizzle with a little olive oil. Season with kosher salt and fresh cracked pepper. Toss with tongs. DELICIOUS combo!


The gremolata can be served over chicken, fish, beef, or on a toasted sandwich. Party of 1? It never hurts to have cooked chicken in the fridge for salads and prepared meals. Gremolata can also be kept in fridge.

hands-on time: 20 minute
total time: 20 minutes
makes 4 servings

4 (6-ounce) skinless, boneless chicken breast halves, pounded to 3/4 inch thick if necessary
1/4 tsp kosher salt for gremolata
1/8 tsp fresh cracked pepper for gremolata
3 tbsp extra virgin olive oil, divided
1/2 cup pecan halves, toasted
1 1/2 tbsp fresh lemon juice
4 green onion chopped (green and light green parts only)
1/4 cup freshly grated Parmigiano-Regiano cheese

Combine pecans, juice, onions, 1/4 tsp salt and 1/8 tsp pepper in a mini food processor; pulse until finely chopped. Add the remaining 2 tbsp olive oil, and pulse to combine. Transfer mixture to a bowl; stir in cheese. Set aside.

Heat a skillet over medium-high heat. Season chicken generously with kosher salt and fresh cracked pepper. Add 1 tbsp olive oil to pan; swirl. Add chicken; cook 4 minutes on each side or until done.Trasnfer to a cutting board.

Slice chicken across grain. Place on plate; top with gremolata. Garnish with chopped green onions and a lemon wedge. The warm chicken softens the gremolata. Ahhh...I can taste it just thinking of it.


Recipe courtesy of Cooking Light

April 25, 2016

Baked Meatball

Finally!! Thank you, Alton Brown, for coming up with a way to make delicious meatballs without spattering oil all over my stove. My son loves meatballs. I just don't make them often, as I hadn't found a tasty and easy recipe til now. Plus, the spinach in it is just bonus.

I used Alton Brown's recipe and changed a couple of things for our family.
http://www.foodnetwork.com/recipes/alton-brown/baked-meatballs-recipe.html

tips:
*I use 1 pound 90%-10% grass fed ground beef and 1/2 pound 93%-7% ground turkey. I tried 99% fat free turkey for the entire recipe, and they were completely dry. The meat needs some fat to help the bread crumbs glisten.
*I use 1/2 a bag of this frozen spinach. It's easier than the frozen spinach block to work with. Heat in microwave in 20 second increments til thawed and squeeze out the water.

*I didn't weigh them as Alton suggested. I just separated them into 20 portions.
*I've used Progresso parmesan bread crumbs, and omitted the grated parmesan to save money. They still turn out flavorful. I do like them best with the parmesan, though.
*Reviews suggested baking sheet if you don't have a muffin tin.

hands-on time: 20 minute
total time: 40 minutes
makes 4-5 servings

1 pound ground round
1/2 pound turkey
5 ounces frozen spinach, thawed and drained thoroughly
1/2 cup fresh grated Parmesan
1 whole egg
1 1/2 teaspoons dried basil
1 1/2 teaspoons dried parsley
1 teaspoon garlic powder
1 teaspoon kosher salt
1/2 teaspoon red pepper flakes
1/2 cup bread crumbs, divided

Preheat the oven to 400 degrees F.

In a large mixing bowl, combine the meat, spinach, cheese, egg, basil, parsley, garlic powder, salt, red pepper flakes, and 1/4 cup of the bread crumbs. Using your hands, mix all ingredients until well incorporated. Use immediately or place in refrigerator for up to 24 hours.

Place the remaining 1/4 cup of bread crumbs into a small bowl. Separate the meat into 1.5 ounce portions (20 portions) and place on a sheet pan. Using your hands, shape the meatballs into rounds, roll in the bread crumbs and place the meatballs in individual, miniature muffin tin cups. Bake for 20 minutes or until golden and cooked through. Serve immediately.

A simple garlic, olive oil, lemon pasta, vegetables and salad make a delicious accompaniment to these meatballs. They also make great meatball sandwiches or are perfect in marinara sauce. My 3 year old eats them. He uses ketchup, of course.


April 18, 2016

My Wardrobe Staple Giveaway

I've loved wearing necklaces for as long as I can remember. They're my wardrobe staple. They can change a plain old tee and jeans to a completely different outfit. I tend to have new favorites every year. My new favorites for the season are these 2 from J. Crew and Francesca's. The yellow necklace can be paired with so many things from a maxi dress and jean jacket to a striped tee and jeans or shorts. The white and silver necklace goes with absolutely everything. I love them both and am having fun making old outfits look new with a little necklace help.


Which brings me to Nifty Neighbor's first giveaway. Let's celebrate the season with my wardrobe staple giveaway! I'm giving away this J. Crew necklace to one lucky winner. The necklace is no longer available on their website and retails for $138.00.


Giveaway Requirements:
1. Follow niftyneighb on Instagram and tag 5 friends on the giveaway post.
2. Like Nifty Neighbor on facebook www.facebook.com/niftyneighbor.blog

That's it! Two simple steps. The giveaway begins Monday, April 18, 2016, and ends at midnight on Thursday, April 21, 2016. The winner will be announced on Friday, April 22, 2016. Good luck!!!


April 13, 2016

Disposable Hand Towel Tip

We have 24 people, participating in a nonstop 200 mile relay race, coming through our home this weekend. My husband is competing in the Ragnar Race, and we offered our home as a resting/eating/showering place in between legs. I'll be using our favorite disposable hand towels in the restrooms.

My mom turned me on to these. They're perfect for guests and every day use. They're made by Kleenex. Just the perfect size. And, best of all, disposable. You know how you have that one hand towel for all guests to use? Ew. This way, every one gets their own hand towel out of a nifty little box. There are about 5 different designs. I've only been able to find them at HEB for $2.97/box. Amazon sells them for $17.82 for a pack of 6 boxes ($2.97/box); and 5% cheaper for subscribe and save. 

We still use the every day washable hand towel, but it's nice to have these out for anyone to use. I've only used them in the downstairs powder bath since that restroom has the most traffic between neighbors and overnight guests. They have now made their grand appearance in all the other restrooms for the weekend. 

April 7, 2016

Thank you

When my son was 1 year old, of course we told him thank you for the obvious things. Thank you for bringing me something. Thank you for giving me something. Thank you for using kind gestures. Then my husband and I got a Daniel Tiger song stuck in our head. "Thank you for everything you do." It was a funny habit to sing this one line when we said thank you to our son.

In that same year, I began thanking him for things to acknowledge good behavior. He quickly caught on. I would thank him for holding my hand while we walked in a parking lot. I would thank him for being a good boy after church, at a store or a restaurant. I kept it simple back then. At age 2, I began to elaborate. If the situation was appropriate, I would thank him for his specific actions and tell him I was proud of him.

By age 3, he beams when my husband and I thank him for his specific behavior. It's such a wonderful way to build self esteem. He remembers how much we appreciate his behavior and continues that behavior when back in the same situation...most of the time. :) I also tend to thank and praise his cousins or friends for playing well together when our playtime is over. I recently sat he and his girl cousin on the last step of her stairs when it was time for us to leave her home. I squatted down and thanked them for playing so well together and how proud I was of them. The 2 beaming faces smiling at me were so precious. They genuinely appreciated my words and acknowledgement.

He will sometimes say excuse me, excuse me, mommy, mommy, mommy, when I'm speaking to someone. He knows it's not appropriate. He knows to say excuse me, but wants me to acknowledge him right when he says it. We're working on that. We haven't tried the placing of his hand on mine (so I know he wants to tell me something), while I'm speaking to someone. I chose to teach him to say excuse me. When we were at lunch yesterday with friends, he knew when to interject in conversation, didn't obnoxiously say excuse me, and was such an angel. Before we got in the car to leave, I squatted down and placed his face in my hands. I looked him in the eyes and told him, "Thank you for being such a good boy. I am so proud of you and the way you behaved at lunch." He was glowing, and said, "Thank you, Mommy!"

March 29, 2016

Mom Tiger

I grew up watching Mr. Rogers Neighborhood, so it was no surprise that I fell in love with Daniel Tiger's Neighborhood. My 1 year old also fell in love with it several years ago. Luckily, he still enjoys watching it at 3 years old.

The show centers around Daniel Tiger, the son of the original Daniel Striped Tiger (Mr. Rogers hand puppet). The program is targeted at preschool-aged children, and is based on the Neighborhood of Make-Believe. Two 11-minute segments are linked by a common socio-emotional theme, such as disappointment and sadness or anger, or being thankful and appreciative. The theme also uses a musical motif phrase, which the show calls "strategy songs", to reinforce the theme and help children remember the life lessons. We often sing Daniel Tiger songs that apply to our situations.

I learned so many new ways of parenting from this show and am intrigued by Mom Tiger (Daniel Tiger's mom). I appreciate her patience, firmness, actions, and choice of words. While I have my own style of parenting, I incorporate her ways into mine.
One of the shows features a song titled: When We Do Something New. When my son was 1, I began using this song to talk about what to expect. While the song focuses on talking about what to expect when something is new, we did that and what to expect in general. He grew up genuinely appreciating and listening to me explain what we are going to do and/or what to expect. It led to us talking about the next day when I lay in his bed with him after prayers. He says: Let's talk about our day tomorrow! We start with waking up, having breakfast and continuing with something he or I may have going on the next day. If he hasn't had one of our homemade frozen blueberry muffins in awhile, I will throw that in the conversation. Something to look forward to. After all, they are his favorite breakfast. We may not always have something going on the next day, but we always wake up, have breakfast, play together and play outside.

I don't sing the song anymore, but I still talk about what to expect. We had an emergency room visit on Easter Sunday night. He DID NOT want to go. He was scared and very upset. I explained how doctors and nurses are helpers just like police officers and fire fighters (his favorite), and they just want us to feel better. I also told him what to expect when we get there (from checking in to taking x-rays) as we were in the backseat while my husband drove. He calmed down and knew exactly what to expect when we arrived.

I am grateful for all Daniel Tiger's Neighborhood has taught my son and I. We do still sing some songs and have our favorites. "You gotta try new food, cause it might taste goo-ood. SO-O good!" Great episode. And guess what! He tries new foods. He may not like it or want to finish it, but he tries it.


March 17, 2016

My Martha Pic

Recreating the cover of a Martha Stewart cookbook, from 1984, was one exceptionally fun cocktail party of 3.

The day I posted the intro for my blog, my mom sent me a picture of a recipe she and I were texting about. When I asked where she got the recipe, she sent me a picture of the cookbook she was looking in. I could not stop laughing when I saw it. How had I not see this cookbook before??! I'm still discovering things about this woman I'm so close to. I thought, "Oh my goodness! I have to recreate this picture." It captures what I love to do...entertain, cook and create.

I'm all about bringing humor to our lives in this ever so critical world we live in, which is why I wore my bridesmaid dress from 1994 and pearls given to me when I was a child. I used a mix of mine and my moms things, vintage from the 80's and modern from today (my napkins, her plates from the 80's, etc). Old and modern...exactly what my blog is about. The only things I purchased for the picture were food and flowers.


There have been many requests for "the shrimp appetizer" featured in my picture. It was also served at the Be Wine Party and has been in the family for over 20 years. Here is the recipe!
hands on time: 45 minutes
total time: 2 hours, 45 minutes
feeds 10 with other appetizers; makes about 45 shrimp


Snow peas, deveined
1 1/2 pounds peeled and deveined boiled shrimp (20-25 count)
Marinade:
1/2 cup extra virgin olive oil
2 tablespoons Dijon mustard
3 tablespoons white wine vinegar
1/2 teaspoon chopped garlic cloves
1 teaspoon onion powder
1/4 teaspoon ginger
1/8 teaspoon white pepper
1/4 teaspoon sugar
1/2 teaspoon kosher salt


Boil snow peas for 4 minutes. Drain and cool.
Marinate shrimp for at least 2 hours.
Wrap shrimp in show peas with a toothpick to hold. Drizzle remaining sauce over shrimp.
*TIP* Whole Foods will steam your shrimp at no charge. It's already peeled and deveined. All you have to do is slide off the tail!

Thank you to my girl friends for taking my picture and turning it into such a fun girls night!


March 6, 2016

The Real Deal Bolognese Sauce

I'm particularly partial to the Bolognese sauce served in Italy. I created a recipe that reminded me of the days I ate pasta with Bolognese sauce every single day while traveling in Italy. One thing I realized during the years it's taken to perfect this recipe is how exceptional it tastes with grass fed ground beef. The grass fed beef consistency is better and tastes delectable. Menus in Italy featured fettuccine, instead of spaghetti, with Bolognese sauce. While we are a whole wheat pasta family, this sauce is great with any type of pasta. I prefer the sauce with fettuccine or linguini. I also love it over spaghetti squash. The recipe freezes well.


hands-on time: 20 minute
total time: 1 hour, 5 minutes
makes 6 servings


2 tablespoons olive oil
1 yellow onion, diced
2 stalks celery, diced
1 carrot, diced
4 cloves garlic, minced
2 pounds ground beef
1/2 cup dry white wine
2  28 oz cans crushed tomatoes
1/2 teaspoon red pepper
2 teaspoons oregano
2 tablespoons parsley
1 tablespoon kosher salt
1/4 teaspoon fresh cracked pepper
1/4 cup fresh grated parmesan (optional)


In a large, tall pot, over medium heat, heat the oil. Add the onion, and sauté for 2 minutes. Add the celery, carrot, and garlic and cook for 5 more minutes. Add the beef and cook until brown. Add the wine and the remaining ingredients. Check for more salt. Simmer for 45 minutes. Serve with pasta or spaghetti squash. Sprinkle with parmesan.


I recommend using only the ingredients listed in the recipe. If you're using a substitute, it will change the flavor and consistency. Also, I choose a tall pot, because the sauce tends to pop a little while simmering. If I'm using a short pot, the sauce pops out of the pot onto the counter or onto my clothes.

Served over spaghetti squash